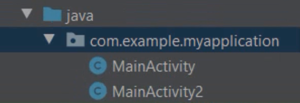
In these tutorials, we are going to change the package name in Android Studio. The default package name is com.example.myapplication. When you create a new empty project, the default package name is ‘com.example…’. You can change the name of this package to whatever you want instead of ‘example’. e.g. com.techypid.myapplication.
In the previous tutorial, we also changed the package name, app name, and project name in Android.
Now, in this article, we want to change the package name.
The default package name is ‘com.example.myapplication’. Here, ‘example’ is the default name. But if you want to publish your app, you’ll need to change the package name. Instead of ‘example,’ you can add your company name and whatever you want. ‘Example’ is not allowed.
Finally, if you want to change the package name instead of ‘example,’ you can do that in Android Studio. To rename/update the package name, follow the given step.

Step 1:
Whatever package name you want to rename, open it in Android Studio project.
Step 2:
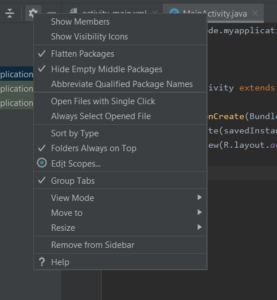
Click on the gear icon.
Step 3:
You can see the options ‘Flatten Package’ and ‘Compact Empty Middle Package’ after clicking on the gear icon.
Default above option is checkmark.

Stet 4:
Uncheck step 3: options.
Step 5:
Your package directory is now split into separate directories.
Step 6:
Select ‘example’ directory.
Step 7:
Right-click on the ‘example’ directory⇾Refactor⇾Rename.
Step 8:
Pop up dialog will open,
Click on ‘Rename Package’ option.
Step 9:
The default package name will be shown in the dialog.
Step 10:
Set a new name and click Refactor.
Package name is almost changed, but it is not shown.ʼ
This requires cleaning and rebuilding your project.
For clean project, click on build⇾clean project and
Rebuild project, click on Build⇾rebuild project.

Now your project’s package name has changed.