Hello there! I hope you’re doing well.
Now that you’ve got your Google Play Console account set up and your identity verified, it’s time to take the exciting step of uploading your Android app and starting your journey on the Google Play Store.
Uploading an app to Google Play isn’t complicated at all, but before we dive into that process, let’s talk about a couple of important things.
Creating your Google Play Developer account and verifying your identity. These steps might take a bit more time, especially because local debit and credit cards aren’t accepted in the Google Play Console account due to certain reasons, which could include religious considerations.
Now, assuming you’ve done all that and you’ve created your app wonderfully, you’re all set to publish it on the Google Play Store. Even if you’re not sure how to create an Android app, don’t worry! There are previous tutorials that can guide you through the entire app creation process.
And guess what? You don’t need to create a super complex app to get started. You can start with a simple one and still publish it on the Google Play Store.
So, let’s break down the steps to submit your app to the Google Play Store:
How to Publishing Android App on Google Play
Step 1: Google play console
First things first, open your preferred web browser and search for “Google Play Console.” You should see the website play.google.com/console.
Step 1: Login you google play console account
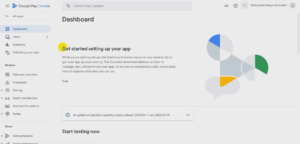
If you haven’t already logged into your Google Play Console account, use the email ID you used to create the account. Once you’re in, you’ll be greeted by your Google Play Console dashboard.
Step 3: Create Your App
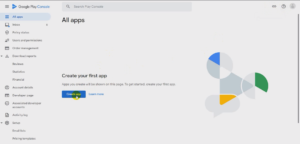
When you reach the “Create app” page, you’ll notice two main sections: “App Details” and “Declarations.” Let’s break down what’s in each section:
App Details Section
- App name: This is where you give your app a name that represents it well. Choose something catchy and informative that will catch users’ attention.
- Default language: Select the language you’ll use to describe your app. This helps users find apps in their preferred language.
- App or game: Decide whether your creation is an app or a game. This clarifies its purpose and functionality.
- Free or paid: Determine if your app will be available for free or if users will need to pay for it.
Declarations Section
In this section, you’ll find some checkboxes related to certain policies. Let’s explore them:
Let’s understand in detail each
- Program polices: These are the rules you need to follow to make sure your app meets Google Play’s guidelines. It’s like agreeing to the terms and conditions.
- Play app signing: This helps keep your app secure by letting Google manage its digital signature. It’s like an online seal of approval.
- use export laws: This checkbox confirms that you’ll follow the export laws and restrictions related to your app. It’s important for international rules.
After you’ve filled out the necessary details and understood these checkboxes, you’re ready for the next step. Simply click the “Create app” button to move forward. This action sets the stage for the next stages of getting your app ready for the world to see!
Step: 3 Setting app dashboard
You will see the dashboard and here you will see get started setting up your app
Here you see different option like start testing now, set up your app, release your app,
Let’s understand each in detail.
- Testing now: This option is like a playground for your app. You can test how your app works, check for any issues, and make sure everything is running smoothly before you let others try it out.
- Set up your app: This is where the real magic happens! You’ll be customizing your app’s details, making it look great, and getting it ready to be published on the Google Play Store.
- Release your app: Imagine this as the big moment when you finally launch your app to the world. But before that, you’ll need to go through some steps to ensure your app is all set and prepared for its debut.
Step 4: Set up your app
In this part of the tutorial, we’ll focus on setting up your app in a step-by-step manner. It might sound a bit technical, but don’t worry—I’ll explain it in a way that’s easy to understand for everyone.
Set up privacy policy
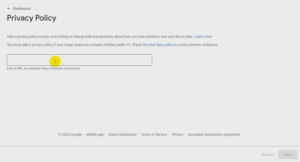
First, let’s talk about your app’s privacy policy. Click on “Set up privacy policy.” You’ll need to provide a link to your app’s privacy policy. Once you’ve added the link, click on the “Save” button. After that, you can go back to the dashboard.
App access
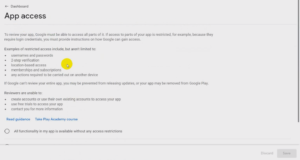
Now, move on to “App access.” Here, you’ll find some guidance. Check the radio button that suits your app. There are two options: one that says all functionality in your app is available without restrictions, and the other that says some functionality might be restricted. Choose the one that fits your app best, and then click “Save.” You can go back to the dashboard.
Ads
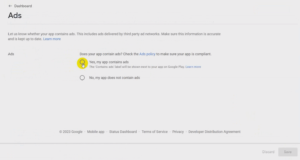
If your app contains ads, click on otherwise choose “No” if it doesn’t. Then click “Save” and go back to the dashboard.
Content rating
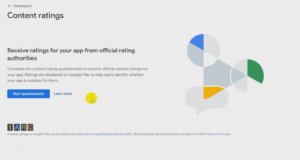
For content rating, click on “Content rating.” You’ll see a button to start a questionnaire. You can also find more information about content rating. In the content rating page, there are three sections: category, questionnaire, and summary.
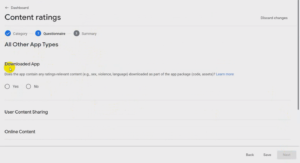
– In the category section, provide your email address and choose the category that best describes your app.
– Click “Next” to move to the questionnaire section. Here, you’ll be asked various questions related to your app’s content.
– Choose the answers that fit your app, and then click “Save.”
After that, you’ll see a summary of the content ratings for different countries. Click “Save” and go back to the dashboard.
Target audience
Click on “Target audience.” Here, you’ll choose the target age group for your app. Read the requirements and click “Next”
First section Target age
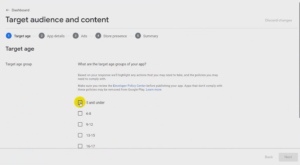
Next section app detail
In the “App detail” section, you’ll find important settings:
– If your app collects personal or sensitive data, choose “Yes” or “No” accordingly.
– Read and check the box for legal and regulatory compliance, indicating that you’ll follow the rules.
Next section Ads
If you’ve made changes to your ad settings, click on “Change ad settings.” Otherwise, click “Next.”
Next section store presence
Here, you can decide if you want your app to be a part of the teacher approval program. Choose the option that suits you and click “Next.”
Next section Summary section
In the next section, you’ll see a summary of all the sections you’ve completed so far. Clicking the “Save” button here finalizes your decisions and saves your progress.
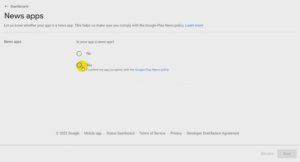
News Apps
If your app is related to news, choose “Yes.” If not, choose “No” and click “Save.”
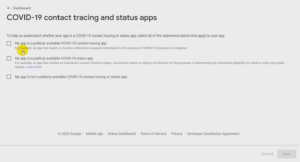
COVID-19 Contact Tracing and Status Apps
If your app is related to COVID-19 contact tracing or status, mark it accordingly. If not, choose “My app is not a publicly available COVID-19 contact tracing or status app.” Then click “Save.”
Data safety
Click on “Data safety.” You’ll need to provide information about how your app handles data. There are sections about overview, data collections and security, data types, data uses and handling, and preview. Fill in the required details and click “Next.”
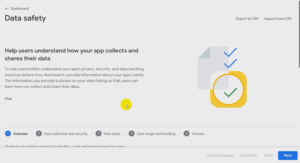
Once you’ve completed all the tasks, click “Save” and go back to the dashboard.
Government Apps
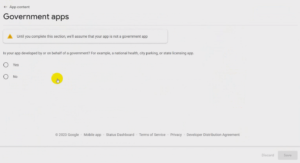
If your app is developed by or on behalf of the government, choose “Yes.” Otherwise, choose “No” and click “Save.” and go back to the dashboard.
Step 5: Mange how your app is organized and presented
Once you’ve completed the previous steps, you’re now ready to manage how your app is organized and presented on Google Play. This is the part where you make your app look appealing to potential users. Let’s break down what you need to do:
Select an app category and provide contact detail
Click on select an app category and provide contact detail.
App category
Click on Edit and Select an app category and provide contact details. This is where you choose the category that best fits your app. You can also add tags to help users find your app more easily.
Store listing contact details
In this section, you need to provide contact information. While providing your email address is mandatory, you can also add your phone number and website if you want. This information helps users connect with you.
Third is external marketing section
Here, you can decide whether you want to advertise your app outside of the Google Play store. You can check or uncheck the box based on your preference.
After you’re done with these steps, you can go back to your dashboard.
Set up your store listing
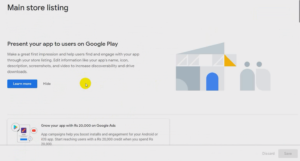
Click on “Set up your store listing”: This is where you start shaping how your app will appear to users.
First section App Related Information
You’ll see fields to add your app’s name, short description, and full description. These details are crucial as they give users an idea of what your app is all about.
Next section App Icon
Upload your app’s icon. It should be in JPEG or PNG format, up to 1MB in size, and measure 512×512 pixels.
Next section graphics
In this section, you’ll upload the visual elements that catch users’ eyes.
Feature graphics
This is the image users see when they visit your app’s page. It should be 1024×500 pixels in JPEG or PNG format, up to 15MB.
Video
You can even add a video demo of your app. Use a YouTube URL in a specific format.
Phone section
Upload screenshots that show how your app looks on phones. These images help users understand your app’s functionality.
Next section Tablet
If your app works on tablets, upload screenshots for 7-inch.
Next upload 10-inch tablet screenshots.
If your app works on 10-inch tablet, upload screenshots for both 10-inch tablet screens.
Next section Chromebook
If your app is compatible with Chromebooks, you can also upload screenshots for this platform.
After you’ve uploaded all the necessary images and information, click the “Save” button to ensure your changes are saved. Then, you can return to your dashboard.
Step 6: Create and publish a Release
Now that you’ve reached the final stages, it’s time to create and publish a release for your app. This is a crucial step because once you’re done here, your app will be on its way to being available to users.
Let’s go through the process.
Click view tasks
Select countries and regions
Click on “View tasks” to see the remaining tasks. One of these tasks is selecting the countries and regions where you want to publish your app.
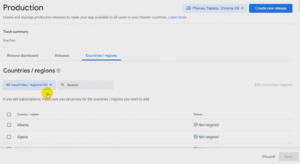
This step is important because some apps might not be suitable for all countries. Some regions or countries might have specific rules or bans. So, choose wisely.
You can click on “Add countries/regions” and select the places where your app should be available. If your app is okay for all countries, that’s great. Just remember to consider any specific restrictions.
Create and Roll out a Release
This part is about creating a new version of your app and making it available to users.
Click on “Create a new release.” If you’re not sure how to create an app bundle, don’t worry. There are resources to guide you.
In this section, you’ll also see something called “App integrity.” Think of this as making sure your app is secure and safe for users.
Choose Your Signing Key
Now, let’s talk about something called a “signing key.” This is like a digital signature that shows your app is genuine and trustworthy. Click on “Signing key.”
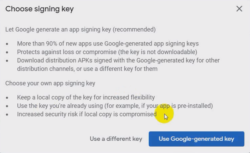
If you’re not sure what that means, there’s information to help you understand. You’ll see two options: “Use different key” or “Use Google-generated key.”
After generating the key you will be able to upload the app bundle.
Then upload the app bundle.
Release details
In this section, you’ll see fields for release details. The “Release name” will be filled automatically once your app bundle is uploaded successfully. Then there’s “Release notes.” This is like a little note to users about what’s new in this version. Maybe it’s bug fixes or new features.
Click Next and Roll Out for Review
After you’re done with all these steps, click “Next.” This will initiate the process of rolling out your app for review.
Remember, the review process might take a bit of time, depending on your app.
And that’s it! You’ve completed the journey of creating and publishing your app on the Google Play Store.
Now, you just need to wait for the review to be done, and soon, your app will be available for users to download and enjoy.
Congratulations!