Date picker dialog
In this android tutorial, we’ll discuss the DatePicker dialog show Date, Month and year
We’ll show it on EditText.
In the previous post, we were shown. how to show TimePicker dialog with “AM” or “PM” mode, when clicking on EditText.
In this post, we’ll learn how to show the DatePicker dialog when clicking on EditText.
Timepicker and DatePicker aren’t a major difference.
What is the DataPicker dialog?
DatePicker dialog is a widget that using we can show the current date or any Date we can set easily.
How to make DatePicker dialog?
You can create DatePicker dialog in 2 ways, one using XML widget and the other way is java programmatically.
In this tutorial, we will create a date picker dialog programmatically.
We will show the Date calendar using EditText.
When the user clicks on the edit text the date picker dialog shows the calendar with the current date.
You can choose whatever data you want, after clicking OK, the calendar automatically disappears.
Let’s start with how to make a date picker dialog in android studio.
To make the DataPicker dialog follow the step.
Step 1:
Open android studio and fill in the all necessary information.
Step 2:
In the android studio, there are default MainActivity.java and activity_main.java.
We will make UI design in main activity_main.xml and backend code in MainActivity.java.
Using this default activity we’ll write some XML layout design code in activity_main.xml.
Activity_main.xml
<?xml version="1.0" encoding="utf-8"?>
<LinearLayout xmlns:android="http://schemas.android.com/apk/res/android"
    xmlns:app="http://schemas.android.com/apk/res-auto"
    xmlns:tools="http://schemas.android.com/tools"
    android:layout_width="match_parent"
    android:layout_height="match_parent"
    tools:context=".MainActivity">
    <EditText
        android:layout_width="wrap_content"
        android:layout_height="wrap_content"
        android:inputType="date"
        android:hint="DD/MM/YYYY"
        android:id="@+id/edtdate"
        android:focusable="false"
        android:ems="15">
    </EditText>
</LinearLayout>
Why used?
In this edittext we used id for unique identity.
The DatePicker Dialog UI in an android studio like as shown below
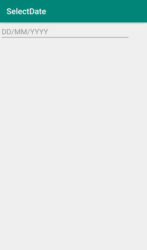
In the above activity_main.xml we used simple edittext.
Now we’ll type some code in MainActivity.java.
MainActivity.java
package com.example.selectdate;
import androidx.appcompat.app.AppCompatActivity;
import android.app.DatePickerDialog;
import android.os.Bundle;
import android.view.View;
import android.widget.DatePicker;
import android.widget.EditText;
import java.util.Calendar;
public class MainActivity extends AppCompatActivity implements View.OnClickListener {
    EditText selectdate;
    private int mYear, mMonth, mDay;
    @Override
    protected void onCreate(Bundle savedInstanceState) {
        super.onCreate ( savedInstanceState );
        setContentView ( R.layout.activity_main );
        selectdate = findViewById ( R.id.edtdate );
        selectdate.setOnClickListener ( this );
    }
    @Override
    public void onClick(View v) {
        if (v == selectdate) {
            final Calendar calendar = Calendar.getInstance ();
            mYear = calendar.get ( Calendar.YEAR );
            mMonth = calendar.get ( Calendar.MONTH );
            mDay = calendar.get ( Calendar.DAY_OF_MONTH );
            //show dialog
            DatePickerDialog datePickerDialog = new DatePickerDialog ( this, new DatePickerDialog.OnDateSetListener () {
                @Override
                public void onDateSet(DatePicker view, int year, int month, int dayOfMonth) {
                    selectdate.setText ( dayOfMonth + "/" + (month + 1) + "/" + year );
                }
            }, mYear, mMonth, mDay );
            datePickerDialog.show ();
        }
    }
}
We discussed the method and class in TimePicker Dialog in detail.
The TimePicker dialog and DatePicker Dialog were the same as TimePicker.
Now, run the program.
Click on edit edittext, the Calender will be shown.
Select Any date the default is current date, month and year.
After, click on ‘ok’.
The Date, month, and year will show in edittext.
Now, we set the current date in datepicker.
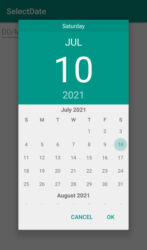
The below showed output in Android studio
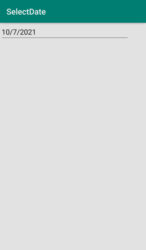
What will the output look like in a real physical Android device?
Watch Demo on YouTube
