Today we are going to start a new tutorial, means we are initiating PHP API and will show data in android RecyclerView. You already know about JSON parsing in ListView in the previous tutorial, and also about JSON parsing and showing data in RecyclerView.
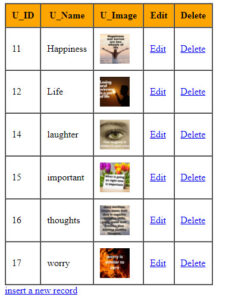
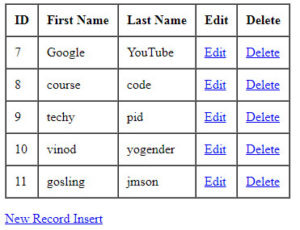
We executed a simple, insert data into a PHP MySQL database online in a previous post. Now utilizing this JSON data we will display the data in android RecyclerView.
PHP data we were converted to JSON format, so we displayed it easily using retrofit and JSON converter library. You know, we already covered this topic in previous tutorials. Also, we perform so JSON objects in ListView and show JSON objects in RecycleView but in this first tutorial that we used our own JSON data mean own inserted data into PHP MySQL database and displaying in android RecycleView.
Insert data through PHP MySQL and display it in Android app.
So guys, let’s start PHP MySQL parsing and show data in RecyclerView tutorials step by step.
Step: 1
Create a new project.
Step: 2
Dependencies
Open build.gradle add the retrofit dependency.
Gradle scripts⇾build.gradle
Build.gradle(module:)
    implementation'com.squareup.retrofit2:retrofit:2.9.0'
    implementation 'com.squareup.retrofit2:converter-gson:2.9.0'
Don’t forget to sync the project.
Step: 3
Open activity_main.xml and add RecyclerView.
Res⇾Layout⇾activity_main.xml.
The following code of activity_main.xml.
activity_main.xml
<?xml version="1.0" encoding="utf-8"?>
<RelativeLayout xmlns:android="http://schemas.android.com/apk/res/android"
    xmlns:app="http://schemas.android.com/apk/res-auto"
    xmlns:tools="http://schemas.android.com/tools"
    android:layout_width="match_parent"
    android:layout_height="match_parent"
    tools:context=".MainActivity">
<androidx.swiperefreshlayout.widget.SwipeRefreshLayout
    android:layout_width="match_parent"
    android:layout_height="wrap_content"
    android:id="@+id/refresh">
    <androidx.recyclerview.widget.RecyclerView
        android:layout_width="match_parent"
        android:layout_height="match_parent"
        android:id="@+id/rv"/>
</androidx.swiperefreshlayout.widget.SwipeRefreshLayout>
</RelativeLayout>
Step: 4
Create a new layout file for singleview.
Res⇾Layout⇾create new layout xml file named singleview.xml.
The following code of singleview.xml.
singleview.xml
<?xml version="1.0" encoding="utf-8"?>
<LinearLayout
    xmlns:android="http://schemas.android.com/apk/res/android" android:layout_width="match_parent"
    android:layout_height="wrap_content"
    android:orientation="vertical">
    <TextView
        android:layout_marginLeft="20dp"
        android:layout_marginRight="20dp"
        android:layout_width="match_parent"
        android:layout_height="wrap_content"
        android:id="@+id/idtxt"/>
<TextView
    android:layout_marginLeft="20dp"
    android:layout_marginRight="20dp"
    android:layout_width="match_parent"
    android:layout_height="wrap_content"
    android:id="@+id/fname"/>
    <TextView
        android:layout_marginLeft="20dp"
        android:layout_marginRight="20dp"
        android:layout_width="match_parent"
        android:layout_height="wrap_content"
        android:id="@+id/lname"/>
</LinearLayout>
Step: 5
Now create a Model named java class.
Java⇾right clicks on the package name⇾new ⇾java class
The following code of the model.java class
Model.java
package com.example.phpmysqlretrofit;
class Model {
    private int id;
    private String fname,lname;
    //generate constructor
    public Model(int id, String fname, String lname) {
        this.id = id;
        this.fname = fname;
        this.lname = lname;
    }
    //getter and setter method
    public int getId() {
        return id;
    }
    public void setId(int id) {
        this.id = id;
    }
    public String getFname() {
        return fname;
    }
    public void setFname(String fname) {
        this.fname = fname;
    }
    public String getLname() {
        return lname;
    }
    public void setLname(String lname) {
        this.lname = lname;
    }
}
Above code, we added variables as per the database table for example id, fname, lname because we’re displaying PHP MySQL JSON data into android RecyclerView.
Step: 6
Now we will create a new interface Java class named MyApi.
The following code of the MyApi.java.
MyApi.java
package com.example.phpmysqlretrofit;
import java.util.ArrayList;
import retrofit2.Call;
import retrofit2.http.GET;
interface MyApi {
    @GET("select.php")
    Call<ArrayList<Model>> callArralist();
}
Step: 7
Now goes to MainActivity.java class.
Java⇾package name⇾MainActivity.java.
The following code of the MainActivity.java.
MainActivity.java
package com.example.phpmysqlretrofit;
import androidx.appcompat.app.AppCompatActivity;
import androidx.recyclerview.widget.LinearLayoutManager;
import androidx.recyclerview.widget.RecyclerView;
import androidx.swiperefreshlayout.widget.SwipeRefreshLayout;
import android.os.Bundle;
import android.view.Display;
import android.widget.Toast;
import java.util.ArrayList;
import retrofit2.Call;
import retrofit2.Callback;
import retrofit2.Response;
import retrofit2.Retrofit;
import retrofit2.converter.gson.GsonConverterFactory;
public class MainActivity extends AppCompatActivity {
private MyApi myApi;
private ArrayList<Model>modelArrayList;
private MyAdapter myAdapter;
private RecyclerView recyclerView;
private String BaseUrl="https://androidcode99.000webhostapp.com/test5/";
private SwipeRefreshLayout swipeRefreshLayout;
    @Override
    protected void onCreate(Bundle savedInstanceState) {
        super.onCreate ( savedInstanceState );
        setContentView ( R.layout.activity_main );
        //initialize id
        recyclerView=findViewById ( R.id.rv );
        //create array list
        modelArrayList=new ArrayList<> ();
        viewJsonData();
        swipeRefreshLayout=findViewById ( R.id.refresh );
        swipeToRefresh();
    }
    private void swipeToRefresh() {
        swipeRefreshLayout.setOnRefreshListener ( new SwipeRefreshLayout.OnRefreshListener () {
            @Override
            public void onRefresh() {
                afterRefresh();
                swipeRefreshLayout.setRefreshing ( false );
            }
        } );
    }
    private void afterRefresh() {
        viewJsonData ();
    }
    private void viewJsonData() {
        //create retrofit
        Retrofit retrofit=new Retrofit.Builder ()
                .baseUrl ( BaseUrl )
                .addConverterFactory ( GsonConverterFactory.create () )
                .build ();
        //retrofit api class
        myApi=retrofit.create ( MyApi.class );
        //display all data from api
        Call<ArrayList<Model>>modelarralist=myApi.callArralist ();
        modelarralist.enqueue ( new Callback<ArrayList<Model>> () {
            @Override
            public void onResponse(Call<ArrayList<Model>> call, Response<ArrayList<Model>> response) {
                modelArrayList=response.body ();
                int i=0;
                for(i=0;i<modelArrayList.size ();i++){
                    //call adapter class
                    myAdapter=new MyAdapter (modelArrayList,MainActivity.this);
                    //implementation linear layout manager
                    LinearLayoutManager manager=new LinearLayoutManager ( MainActivity.this,RecyclerView.VERTICAL,false );
                    //set layout manager in recyclerview
                    recyclerView.setLayoutManager ( manager );
                    //set adapter
                    recyclerView.setAdapter ( myAdapter );
                }
            }
            @Override
            public void onFailure(Call<ArrayList<Model>> call, Throwable t) {
                Toast.makeText ( MainActivity.this, "data does not fetch", Toast.LENGTH_SHORT ).show ();
            }
        } );
    }
}
Step: 8
Create a class named MyAdator.
Java⇾right click on the package name⇾new ⇾java class.
The following code of MyAdapter.java class.
MyAdapter.java
package com.example.phpmysqlretrofit;
import android.content.Context;
import android.view.LayoutInflater;
import android.view.View;
import android.view.ViewGroup;
import android.widget.TextView;
import androidx.annotation.NonNull;
import androidx.recyclerview.widget.RecyclerView;
import java.util.ArrayList;
class MyAdapter extends RecyclerView.Adapter<MyAdapter.ViewHolder> {
    //create variable
    private ArrayList<Model>modelArrayList;
    private Context context;
    //generate constructor
    public MyAdapter(ArrayList<Model> modelArrayList, Context context) {
        this.modelArrayList = modelArrayList;
        this.context = context;
    }
    @NonNull
    @Override
    public MyAdapter.ViewHolder onCreateViewHolder(@NonNull ViewGroup parent, int viewType) {
        //layout inflater
        View view=LayoutInflater.from ( parent.getContext () ).inflate ( R.layout.singleview,parent,false );
        return new ViewHolder (view);
    }
    @Override
    public void onBindViewHolder(@NonNull MyAdapter.ViewHolder holder, int position) {
        //get position
        Model model=modelArrayList.get ( position );
        holder.id.setText ("Id:-"+ model.getId ()+"\n" );
        holder.fname.setText ( "First Name:-"+model.getFname ()+"\n" );
        holder.lname.setText ( "Last Name:-"+model.getLname ()+"\n" );
    }
    @Override
    public int getItemCount() {
        return modelArrayList.size ();
    }
    public class ViewHolder extends RecyclerView.ViewHolder {
        TextView id,fname,lname;
        public ViewHolder(@NonNull View itemView) {
            super ( itemView );
            id=itemView.findViewById ( R.id.idtxt );
            fname=itemView.findViewById ( R.id.fname );
            lname=itemView.findViewById ( R.id.lname );
        }
    }
}
Step: 9
Permission
Finally, the project is ready, but we show an online database in Android RecyclerView, so it is essential to have internet permission in Android.
Open AndroidManifest.xml and add the following INTERNET permission.
Go to Manifests⇾ AndroidManifest.xml
<uses-permission android:name="android.permission.INTERNET"/>
Now the project is ready.
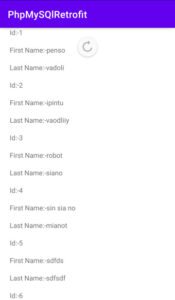
Run your app and you will see output like below.


