In the Android tutorial, the most ordinarily used is the SQLite database, an offline and open source database. SQLite can store data on your local device. Now we need to store data online, so we are starting a PHP MySQL tutorial to store data in an online PHP MySQL database and display data in an Android app.
It is important to know what functions are accomplished in these tutorials so that we can know some info before starting the tutorial.
These are the first tutorials with PHP MySQL databases, so the first thing you need to know is a brief. We are introducing PHP code only because, foremost, you should understand the basic concept of PHP. Once you understand the basic concept of PHP, you can make your code secure by changing a few security objectives. In these tutorials, we have not taken care of SQL injection because if it is taken care of, then PHP code is not understood, so for the sake of ease, simple code has been given. If you want to store user data, then your PHP code should be secure and safe against SQL injection. If you want more security in PHP, add some safeguards against SQL injection.
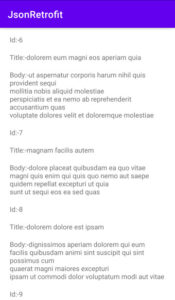
We put data in PHP MySQL and then convert it to JSON format, then display it in RecyclerView. All the tasks are done step by step to easily implement PHP code and display the data in RecyclerView.
We mainly used the Retrofit library and Retrofit JSON converter library to display data in RecyclerView. So in this tutorial also used Retrofit and JSON Converter library.
You know, usually and the practice used for PHP MySQL offline doesn’t use a live web server for database storage because the live web server is expensive. Somehow, we are buying some space for website hosting and database storage. Some companies provide cheap hosting, while some companies provide unlimited databases for first-year low-cost plans. If you are a starter, you don’t need to buy it.
You must have also used offline databases like installing the xampp server in your local computer or using wampServer extensively. And other online servers also provide the same service.
What is the difference between Online MySql Database vs Offline Database?
There is no huge difference between offline xampp servers vs online xampp servers. A local computer and a server computer become separate. Then we save all files in htdocs to xampp server.
Why offline MySQL xampp vs online xampp server.
There are some problems while installing xampp server on some computers. Such as xampp port issue and other installation problems. Some xampp alternatives like wamp server, mamp server, esyPHP, xpn-xm, ampps, UwApm server among others are available for storing data offline.
In simple words, online data, you can access widely whereas offline data is retrieved only when your computer is on. By using an online database, we can get the data in a webpage and display it using some additional designs and web layouts. So for this reason, we used an online database.
So guys in these tutorials we will use an online database so that we can communicate easily with android. Because we want to display data in android RecyclerView.
For practice, here, we will use a free hosting service to store the online data. There is no need to pay money. When you will publish your app, then you can purchase it.
So let’s start the PHP MySQL tutorial.
In these tutorials, we will see how to insert data into MySQL database and then convert it to JSON format, and then we will show the data in android RecyclerView.
How to insert data into PHP MySQL database.
Step: 1
Login to your hosting account.
Note:- If you want offline database like xampp. Later you can access it by uploading the file to the online database.
For an online database, you need an online DB name, DB user, hostname, and password. For offline you used hostname as its localhost, user as its root, and dbname as your database name.
Step: 2
Go to file manager and also open PhpMyAdmin and create a new table and full name as per your requirement. If you don’t understand, then follow the video.
After creating database, go to file manager and create a new file inside public_html and inside .htdocs in xampp.
CREATE TABLE `student_table` (
  `id` int(10) NOT NULL,
  `fname` varchar(100) COLLATE utf8_unicode_ci NOT NULL,
  `lname` varchar(100) COLLATE utf8_unicode_ci NOT NULL
) ENGINE=InnoDB DEFAULT CHARSET=utf8 COLLATE=utf8_unicode_ci;
Step 3:
PHP Creates a database connection file to connect to the MySQL database, so we store it remotely in the same way as the XMPP server procedure.
<?php
$server_name='localhost';
$db_user='id18020730_database_username_12345678';
$db_pass='1YH]TS4q%h%Jjxhi';
$db_name='id18020730_12345678_dbname';

$conn=mysqli_connect($server_name,$db_user,$db_pass,$db_name);
if(!$conn){
    die(mysqli_error());
}
?>
Step: 4
Now we are creating a new file named index.php to insert the data.
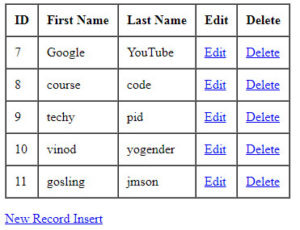
Also, we will create an HTML file for the client site to view the same file.
<?php
include'config.php';
if(isset($_POST['insert'])){
    $fname=$_POST['fnametxt'];
    $lname=$_POST['lnametxt'];

    $query="INSERT INTO student_table(fname,lname)VALUES('$fname','$lname')";
    $result=mysqli_query($conn,$query);
}
?>

<html>
    <head>
        <title>
            andorid retrofit mysql
        </title>
    </head>
    <body>
        <form action="index.php" method="POST">
            First Name:<input type="text"name="fnametxt"/><br >
            Last Name:<input type="text" name="lnametxt"/><br >
            <input type="submit" name="insert" value="Ok"/><br >
        </form>
    </body>
</html>
Step: 5
Now we want to show data in android RecycleView so create a new file named select.php and convert it to JSON.
<?php
include'config.php';
//fetch all user data from mysql database
$query="SELECT *FROM student_table";
$result=mysqli_query($conn,$query);

$rows=array();
while($row=mysqli_fetch_assoc($result)){
    $rows[]=$row;
}
echo json_encode($rows);
// close connection
mysqli_close($conn);
?>
Your PHP MySQL API is complete. Now connect it in android RecyclerView.


