Today we will integrate AdMob Native Ads. Most people are aware of AdMob Native Ads. If not, then this tutorial is for you.
In the previous post we will learn about AdMob banner ads, interstitial ads, interstitial on click button and interstitial video ads. Now let us learn about native Ads.
Native Ads are loaded via the AdLoader class which is what we already know about in the previous post.
For the better user experience and Ad style, here we will use native Ads template. Download native Ad template. You can easily implement and require no more code and also customize your UI design.
What size Native Ads template?
There are two basic template sizes; There are medium and small sizes. In this tutorial, we’ll try both types of Ads.
How to integrate Native Ads templates in Android Studio?
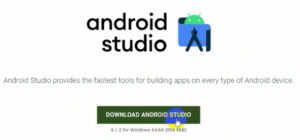
First download the native ads template from GitHub.
Native template contains zip file so extract zip file.
How to add native Ads in Android Studio?
Now we will understand practically step by step…
Step 1:
Create a new project.
Step 2:
How to Add Native Ads Templates to Android Studio
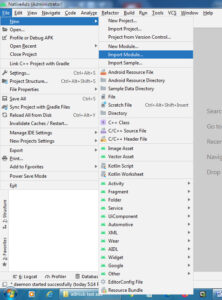
Now we add native Ads template in android studio.
File ⇾new ⇾import module
Import module from source
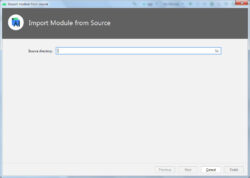
Here select the folder that we extracted.
Step 3:
We’ve added a native Ads template. Now go to Gradle Scripts.
Gradle Scripts ⇾build.gradle(:app)
Add the following 2 dependencies. and sync project.
 implementation 'com.google.android.gms:play-services-ads:20.4.0'
    implementation project(':nativetemplates')
Step 4:
Manifests⇾AndroidManifest.xml
Now add internet permission and Ads meta-data.
Internet permission
<uses-permission android:name="android.permission.INTERNET"/>
Meta-data
        <meta-data
            android:name="com.google.android.gms.ads.APPLICATION_ID"
            android:value="@string/appId"/>
Step 5:
Go to activity_main.xml and add the following code.
activity_main.xml
<?xml version="1.0" encoding="utf-8"?>
<LinearLayout xmlns:android="http://schemas.android.com/apk/res/android"
    xmlns:app="http://schemas.android.com/apk/res-auto"
    xmlns:tools="http://schemas.android.com/tools"
    android:layout_width="match_parent"
    android:layout_height="match_parent"
    tools:context=".MainActivity">

    <com.google.android.ads.nativetemplates.TemplateView
        android:layout_width="match_parent"
        android:layout_height="wrap_content"
        android:id="@+id/nativeads"
        app:gnt_template_type="@layout/gnt_small_template_view"
        android:layout_gravity="center"/>

</LinearLayout>
For a medium template, add the following line instead of a small template
app:gnt_template_type="@layout/gnt_medium_template_view"
Step 6:
Go to MainActivity.java and add the following line of code.
Run your project and see the output.
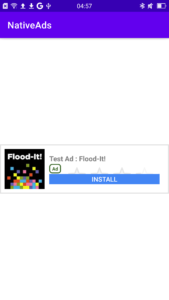
Native Ads output will appear like the below screenshot.
For extra customize style
Visit the official site.
